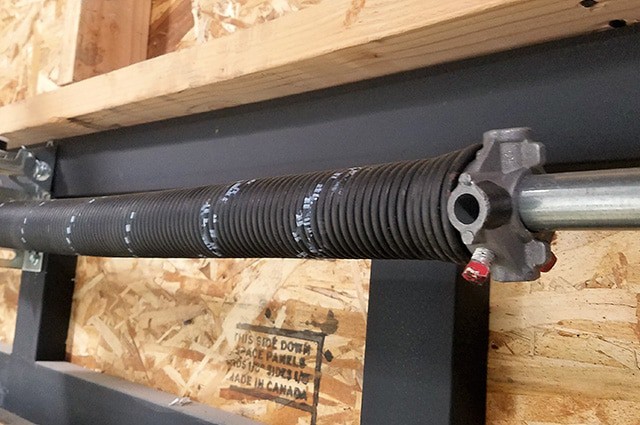
Garage door torsion springs are the unsung heroes of our daily lives, silently bearing the weight of our garage doors and ensuring smooth operation. However, these powerful components can pose significant risks if not handled properly. As a seasoned garage door technician with over a decade of experience, I've seen firsthand the importance of understanding these springs and the potential dangers they present. This comprehensive guide will walk you through the process of safely replacing and adjusting garage door torsion springs, helping you maintain your garage door's functionality while prioritizing safety.

Recognizing the Need for Replacement
Before diving into the replacement process, it's crucial to identify when your torsion springs require attention. Over the years, I've encountered numerous telltale signs that indicate a spring is nearing the end of its life:
Audible Indicators: If your garage door starts making unusual noises during operation, pay attention. Strangled or grinding sounds often signal worn-out or damaged springs. I once had a client who ignored these warning signs, only to have their spring snap unexpectedly, causing the door to crash down.
Balance and Movement Issues: A well-functioning torsion spring should hold the door in place when raised halfway or fully open. If you notice the door struggling to maintain these positions or feeling heavier than usual, it's time to inspect the springs. In one memorable case, a homeowner's door would only open about six inches before stopping – a clear indication of a failing spring.
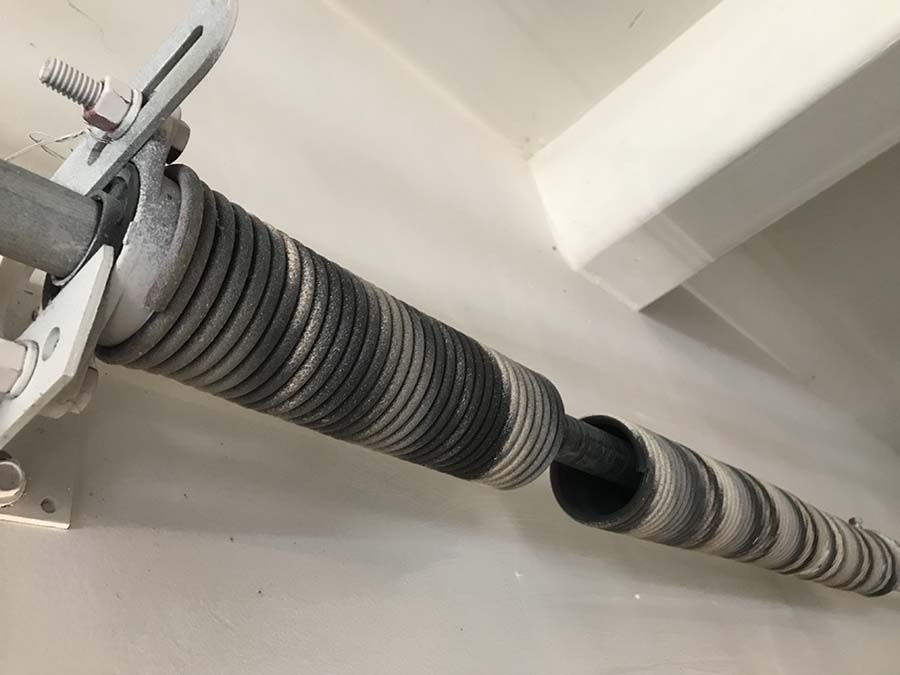
Visual Cues: Regular visual inspections can reveal a lot about your springs' condition. Look for gaps between coils, rust, breaks, or elongation. I've seen springs with visible gaps that were on the brink of failure, posing a serious safety risk to the homeowners.
Erratic Door Behavior: If your garage door starts behaving erratically – slamming shut unexpectedly, moving jerkily, or becoming misaligned – don't ignore these signs. They often point to failing torsion springs that need immediate attention.
Safety First: Preparing for Replacement
Replacing torsion springs is not a task to be taken lightly. The tension in these springs can be equivalent to several hundred pounds of force. Before you begin, take these crucial safety measures:
- Disconnect the Power: Always unplug the garage door opener to prevent accidental activation during the replacement process. I once witnessed a near-miss when a homeowner forgot this step, and the opener suddenly engaged mid-replacement.
- Use Proper Tools: Invest in the right tools, particularly winding bars designed specifically for tensioning springs. Avoid the temptation to use makeshift tools like screwdrivers – I've seen serious injuries result from tools slipping under tension.
- Wear Protective Gear: Safety goggles and sturdy gloves are non-negotiable. These can protect you from potential injuries caused by high-tension components.
- Understand the Mechanism: Take time to familiarize yourself with how torsion springs work and their role in the garage door system. This knowledge is crucial for safe handling and can help you spot potential issues before they become dangerous.
- Know Your Limits: If you're uncertain about any aspect of the procedure, it's best to seek professional assistance. Many manufacturers don't sell torsion springs directly to the public due to the associated risks, and for good reason.

The Replacement Process
Now that we've covered the essentials of safety and preparation, let's walk through the step-by-step process of replacing your garage door torsion springs:
- Gather Your Tools and Materials: You'll need winding bars (at least 18" long with sharp, 90-degree cut edges), vice grips, wrenches, a ladder, and your replacement springs. Ensure you have the correct size springs by carefully measuring the old ones – length, wire size, and internal diameter are all crucial.
- Unwind the Old Springs: Using your winding bars, carefully unwind the unbroken spring first. For a typical seven-foot door, this involves about 30 quarter turns. Always maintain a firm grip on the winding bar and be prepared for resistance.
- Remove the Old Springs: Once unwound, loosen the set screws and center wall bracket bolts to remove the old springs from the torsion bar. This is also a good time to inspect your cables for any signs of wear.
- Install the New Springs: Place the new springs on the torsion bar, ensuring correct orientation. Remember, the right-hand wind spring goes on the left side and vice versa.
- Wind the New Springs: Using your winding bars, carefully tension the new springs. For a seven-foot door, this typically involves 31 quarter turns. Always keep your body out of the path of the winding bar in case it slips.
- Test and Adjust: After installation, check the garage door's balance and ensure smooth operation. Make any necessary adjustments to achieve the perfect balance.

Common Pitfalls to Avoid
Throughout my career, I've seen homeowners make several common mistakes when dealing with torsion springs:
- Underestimating the Danger: Torsion springs store an enormous amount of energy. Never attempt a replacement without proper knowledge and tools.
- Mismatched Springs: Always replace both springs, even if only one is damaged. This ensures balanced operation and prevents premature wear.
- Skipping Maintenance: Regular lubrication and inspections can significantly extend the life of your springs and catch potential issues early.
- Ignoring Professional Advice: If you're unsure about any aspect of the process, don't hesitate to call a professional. The cost of a service call is far less than the potential medical bills from an accident.
The Importance of Regular Inspections
To maintain safe operation, inspect your springs twice a year for signs of wear and tear. Look for warning signs like excessive noise, imbalanced movement, or visible damage. Consider scheduling annual professional inspections to catch issues you might miss.
Typically, garage door springs last between 7-9 years or 10,000 to 20,000 cycles. However, this can vary based on usage and environmental factors. Regular maintenance, including lubrication every few months, can help extend their lifespan.
Conclusion
Mastering the art of safe garage door torsion spring replacement and adjustment is a valuable skill for any homeowner. However, it's crucial to approach this task with the respect it deserves. The power stored in these springs is not to be underestimated.
Throughout my years in this industry, I've seen the consequences of both well-maintained systems and neglected ones. The difference in safety and functionality is stark. By following these guidelines and prioritizing safety, you can keep your garage door operating smoothly for years to come.
Remember, there's no shame in calling a professional if you're unsure about any step in the process. Your safety and the proper functioning of your garage door are paramount. With the right knowledge, tools, and respect for the task at hand, you can ensure your garage door remains a reliable part of your home for years to come.

